Source context: This field note first appeared on Eric's Advisory Hour Substack. View the canonical post.
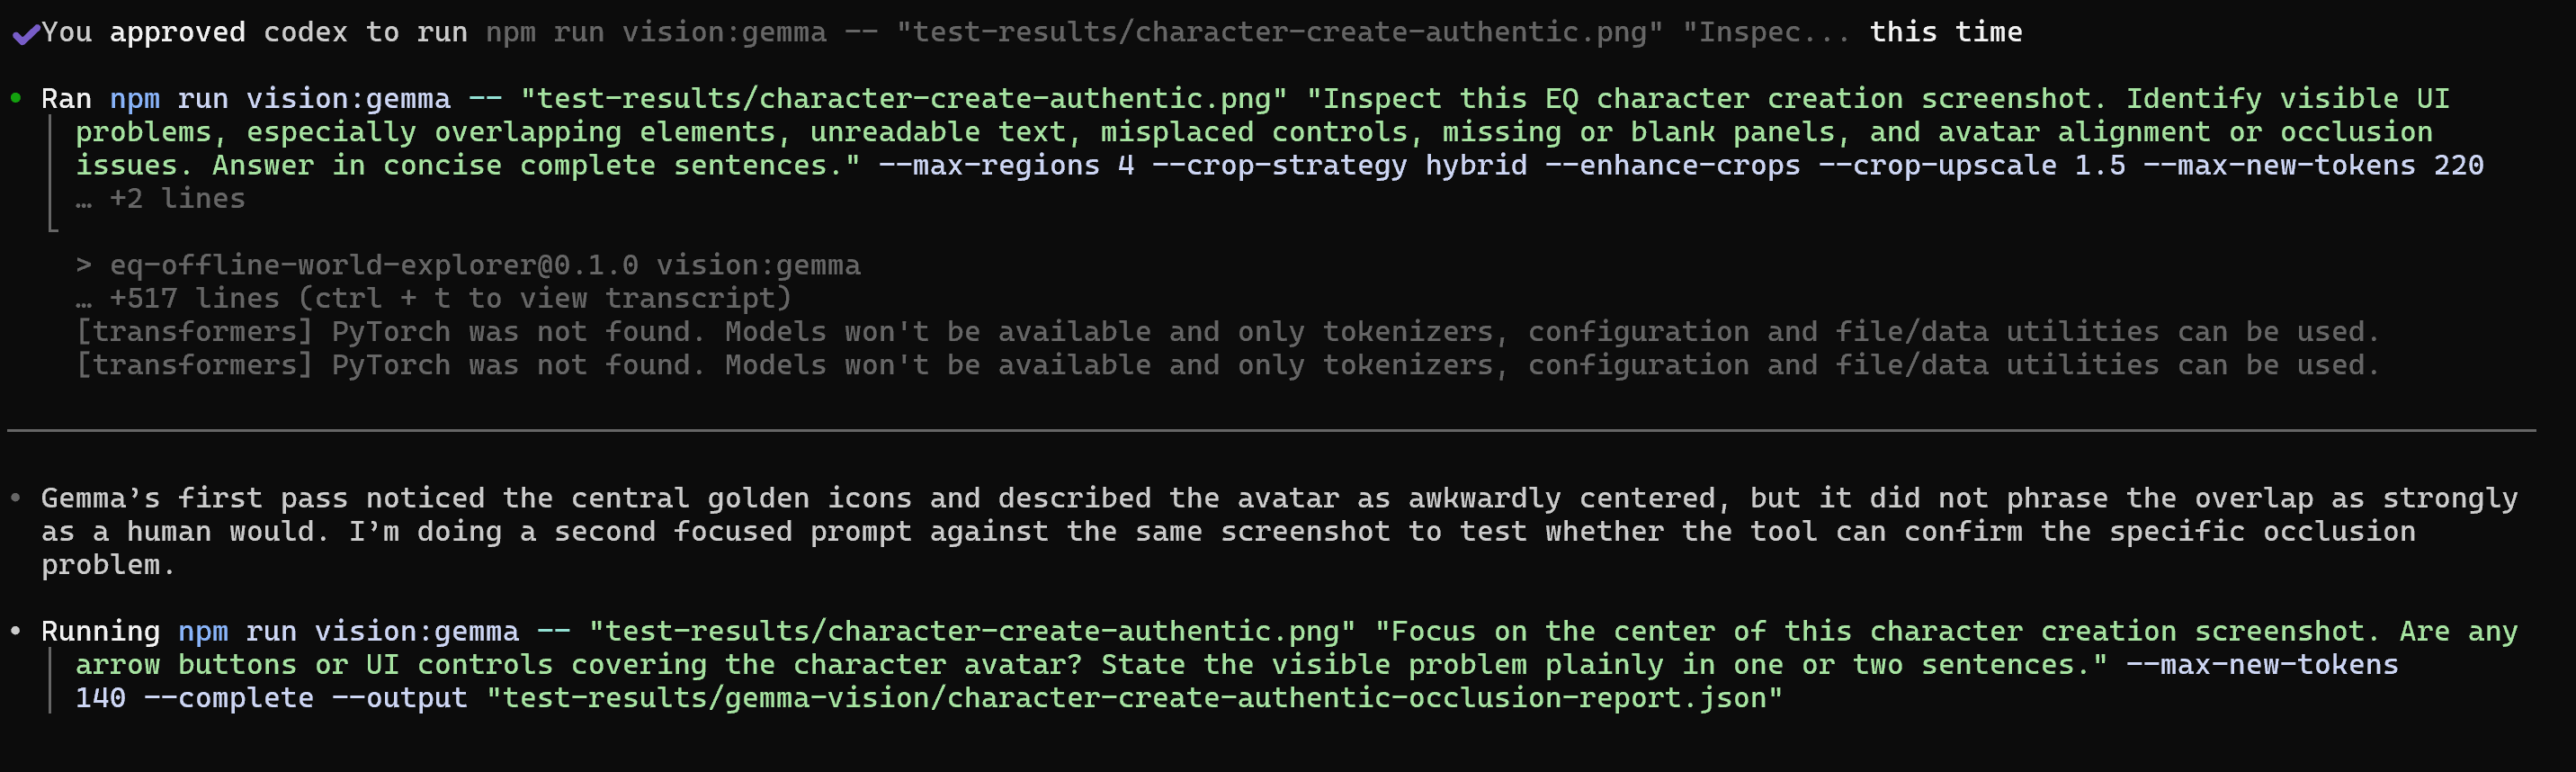
Could I use a local vision model and coupled with a little clever harness work, do something useful that the native vision model in Claude and Codex both have failed to do? Yes. Yes, it can.
But here’s the thing. The captivating allure that I can save precious money as tokens are burned doing browser work on-my-device.
Turns out local vision is both useful and affordable. If you track your lifetime usage and compare that to what it would have cost, it might even be enough for you to make a workflow change. Imagine if, though, you could run so far on the edge it’s powered by battery.
I’m running inference on a battery powered device. This means a few things. One is that it’s possible. And then there’s the bill: setting aside the equipment, the cost of my inference is electricity and time. Do tasks really need to be done immediately? I often set loose a task and then retire for the night. These days I find myself infrequently at the computer. It simply is working in the background.
Cost and power optimization is a weird hobby of mine. It’s not that I’m cheap. I grew up in rural indiana population 962 (as of today, it’s grown!). Engineering for cost optimization is a way of life.
I’ll write more about cost optimization later. You can realize many immediate benefits by adopting a small idea: write benchmarks and evals. In fact, every benchmark and eval run done on your local device is a cost-saving move that adds up. I set the price to what the frontier labs charge per token for their super-intelligent models. Maybe, just maybe, those tokens can be so much cheaper.
Benchmarks track utility. In the current incarnation of this soup of code lays several evals and benchmarks in the works to make sense of both how much money I’m saving and what’s effective. That’s far too much for an article about “How do I get vision to work?” But let me tell you, you’ll want to track your local inference usage. Seeing how much money you save for getting the same work done is one heck of a KPI.
Also, for the builders in the room: just send this article to your AI harness. It’ll be able to parse this and get you a local vision model, too. One that solved a problem that openai and claude (5.5 and 4.7) did not solve. Stunning, to say the least. Here’s how it worked:
One way of doing Gemma4 Vision
The big idea is that local multimodal inference isn’t framed like “i’ll just send an image to a model”. You’re not going to get the fidelity you want. Instead, you need to look to the past. Do you remember how progressive images used to load on slow internet? That concept is such a huge unlock for AI, including even vision models.
In your harness, screenshots are converted to image features that are fed into the gemma token stream, and then your target inference architecture goes from there. Inference architecture meaning are you running inference on the CPU or a GPU or NPU, etc.
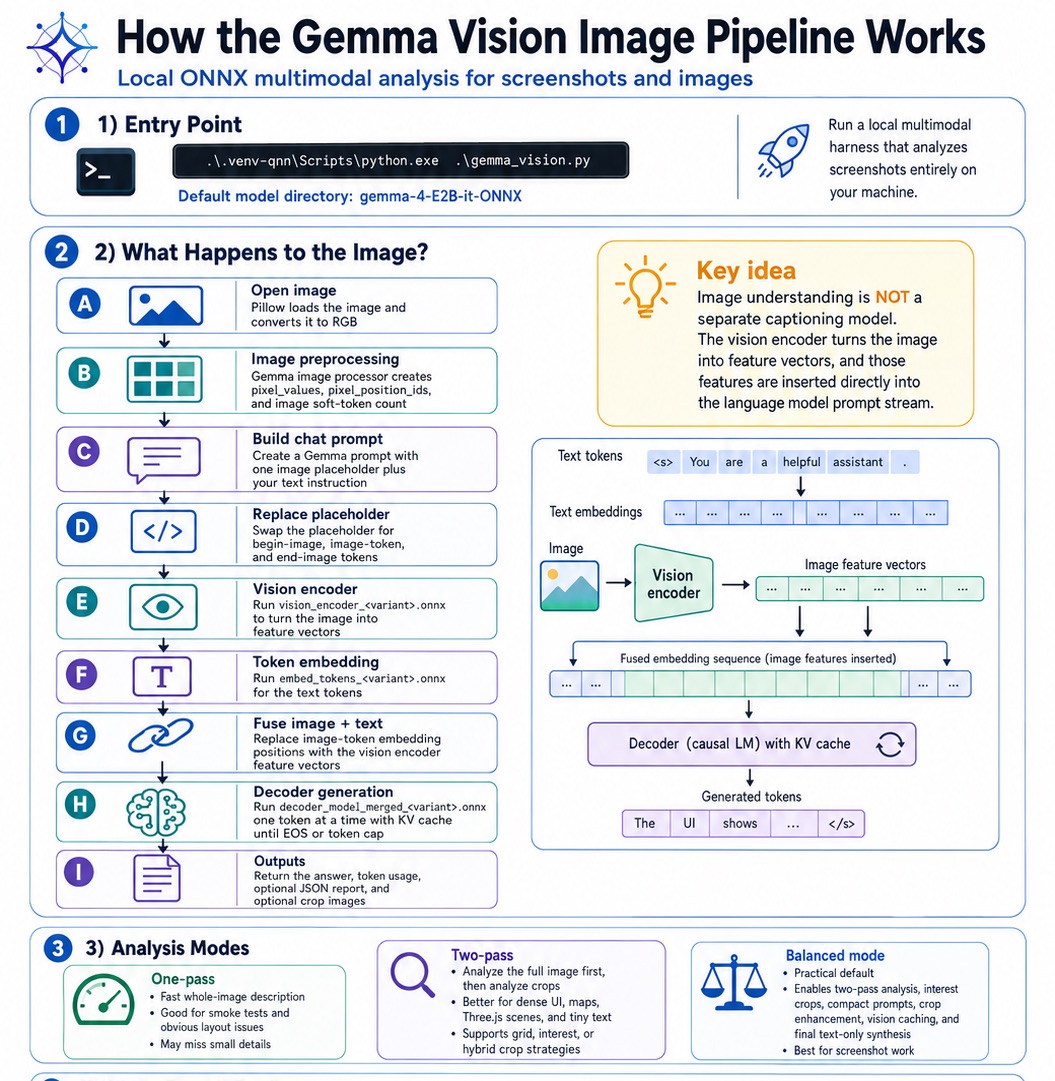
The NPU runtime I’m working in makes use of ONNX. In the case of my Gemma4 Vision setup, I am using gemma-4-E2B-it-ONNX.
The basic idea is that I have three ONNX sessions that get started up for the vision process.
- A vision encoder
- A token embedding process
- A decoder
The algorithm:
- Opens the image with Pillow and converts it to RGB.
- Runs the Gemma image processor to produce
pixel_values,pixel_position_ids, and the number of image soft tokens. - Builds a Gemma chat prompt with one image placeholder and the text prompt.
- Replaces that image placeholder with Gemma begin-image, image-token, and end-image tokens.
- Runs the vision encoder to produce image feature vectors.
- Runs token embedding, then replaces the image-token embedding positions with the vision encoder features.
- Runs the merged decoder one token at a time with a KV cache until EOS or the token cap. This is a very important step!
- Records token usage and optionally writes JSON reports and crop images.
This isn’t a captioning system or labeling system, per se. The encoder is converting the image into feature vectors. Those features are then directly inserted into the prompt stream. And that works, brilliantly.
The vision script I use does one other thing: it has segmentation and progressive layering. Here’s how this idea works-and it’s an unexpected benefit from John’s World!
The idea is that you take an image and describe it in layers. First the overall image and then slice up the image based on a schematic. It could be via a cartesian system, or it could be based on segmentation rules.
I had ChatGPT build this vision pipeline image up so you should be able to drop this into a harness of your choice and get back something very similar, if not better.
What’s the utility of this?
I tested this approach out on a threejs issue I had with a fun project. The system was able to identify the issue, and also verify the fix- using vision captured images and the browser tool. Those tokens were effectively free.
Further, as a CLI tool… this means I can use Codex (or Claude Code) to offset my usage of those tools. In this way I get the benefit of local inference while also getting the benefit of a much more capable model. Can you have your cake and ice cream? Yes.
Related notes
This continues the local-inference thread from Tinkering with a NPU, NPU and Gemma4, and Experimenting with a Custom Gemma Harness.
Original source
This local copy preserves the article text, source link, and inline media. Canonical Substack URL: https://advisoryhour.substack.com/p/gemma4-harness-for-vision-on-gpunpucpu.